Adding a new domain to your YesDomain Hosting Account allows you to host multiple websites under one hosting plan. This is useful for managing different projects, businesses, or sub-sites efficiently.
Steps to Add a New Domain to Your YesDomain Hosting Account
Step 1: Log in to Your YesDomain Control Panel
- Visit the YesDomain Client Area Login.
- Enter your email and password, then click Login.
- Select your hosting package from the “My Services” section.
- Click on “Access Control Panel”.
📌 Related Guide: How to Access YesDomain Control Panel
- In the control panel, click on “Domain Setup”.
- Click on the “Add New” button.

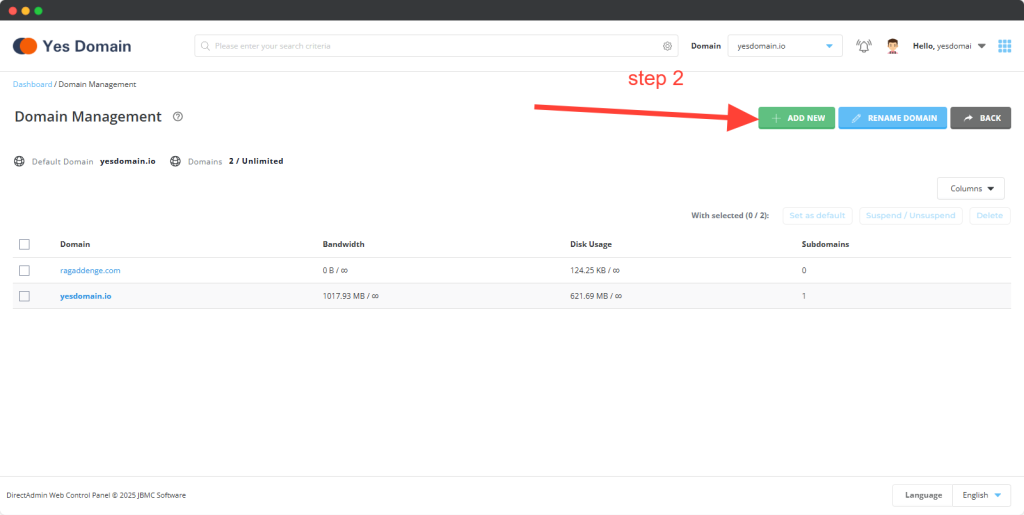
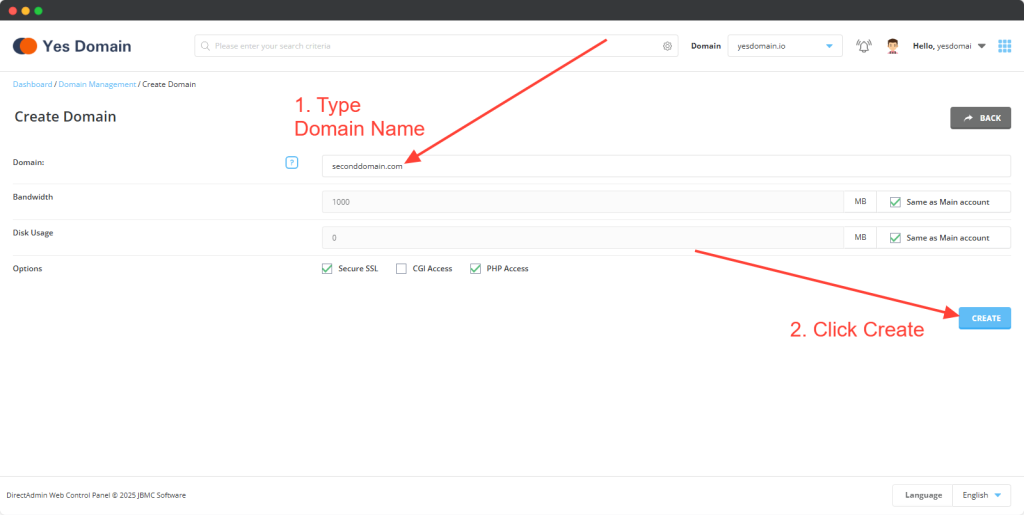
Step 3: Add Your New Domain
- Enter the new domain name you want to add.
- Ensure that the domain is correctly spelled and registered.
- Click on the “Create” button to complete the process.
Step 4: Update Domain Nameservers
After adding the domain, ensure that:
✅ The domain is pointing to YesDomain’s nameservers.
✅ If the domain is registered elsewhere, update the DNS settings to YesDomain’s hosting.
📌 Related Guide: How to Change Nameservers at YesDomain
Common Issues & Troubleshooting
1. “Domain is not pointing to the correct nameservers”
- Double-check and update the nameservers with your domain registrar.
- Wait for DNS propagation (may take up to 24 hours).
2. “Addon domain limit reached”
- Ensure your hosting plan supports multiple domains.
- Upgrade your plan if necessary.
Conclusion
Adding a new domain to your YesDomain Hosting Account is quick and easy. Once set up, you can install WordPress, create email accounts, and manage your website seamlessly.
📌 Next Steps:
- How to Create a New Email Account in YesDomain Control Panel
- How to Log in to Your WordPress Admin Dashboard
For assistance, feel free to contact YesDomain Support.