In this article, we will guide you through the step-by-step process of configuring your Yes Domain email on the Windows Mail app. By following these steps, you can efficiently manage your emails directly from your Windows device.
Why Configure YesDomain Email in Windows Mail?
Setting up your YesDomain email in the Windows Mail app allows you to:
✅ Access your business emails seamlessly.
✅ Send and receive emails without logging into the webmail.
✅ Improve productivity with instant notifications.
Step-by-Step Guide to Setting Up YesDomain Email in Windows Mail
Step 1: Log in to Your Hosting Control Panel
First, log in to your YesDomain hosting control panel.
Read For How to Log in to Your Control Panel Using the YesDomain Client Area
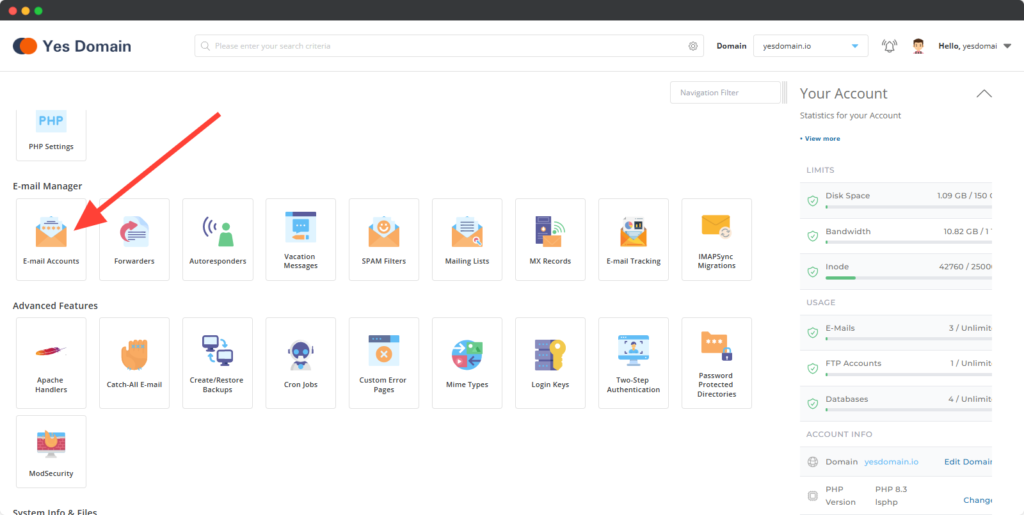
Go to Email Manager > Email Accounts section.
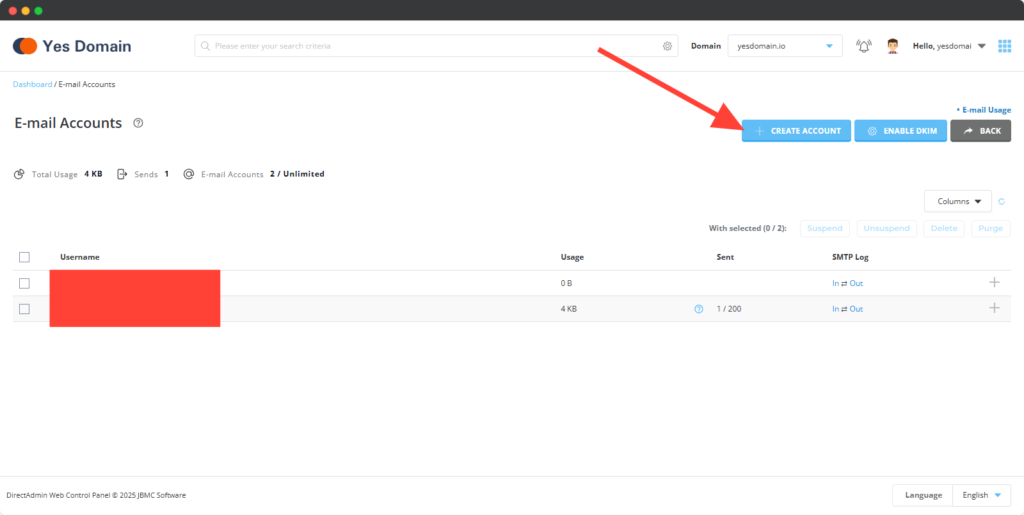
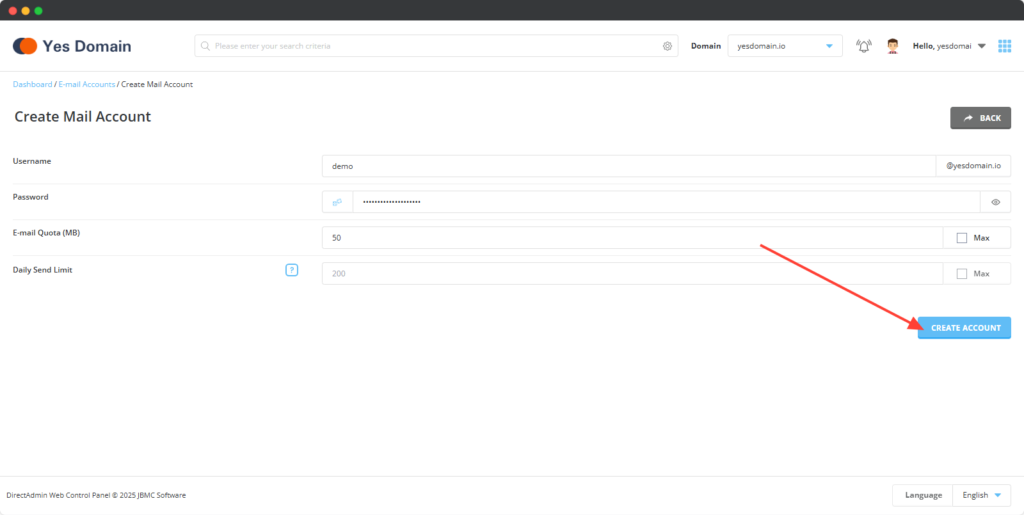
Step 3: Create a New Email Account (If Not Already Created)
If you don’t have an existing email account, create one by entering your domain email details. If an email account already exists, proceed to the next step 3 and 4.
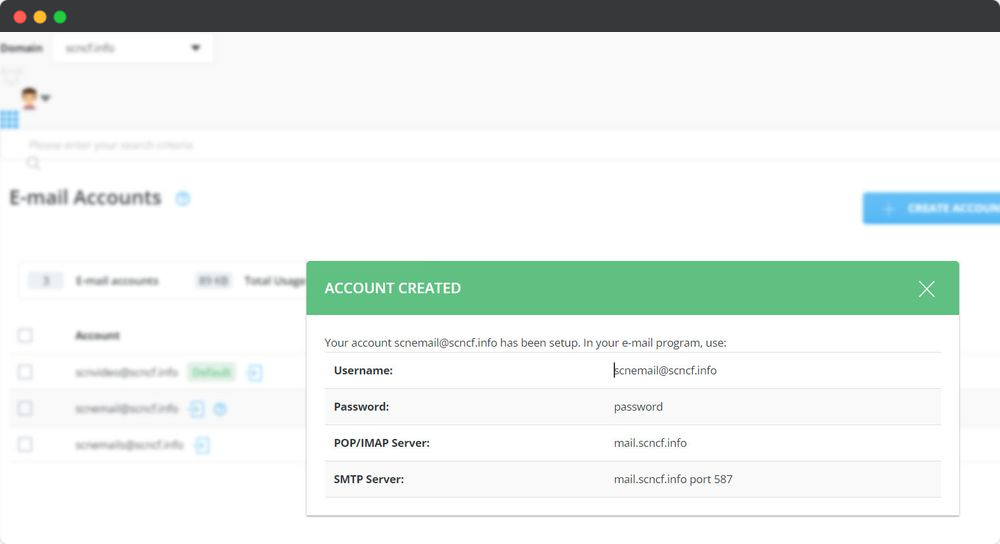
Step 4: Note Down Your Mail Settings
Make sure to copy the POP, IMAP, and SMTP settings, as these will be required for the setup.
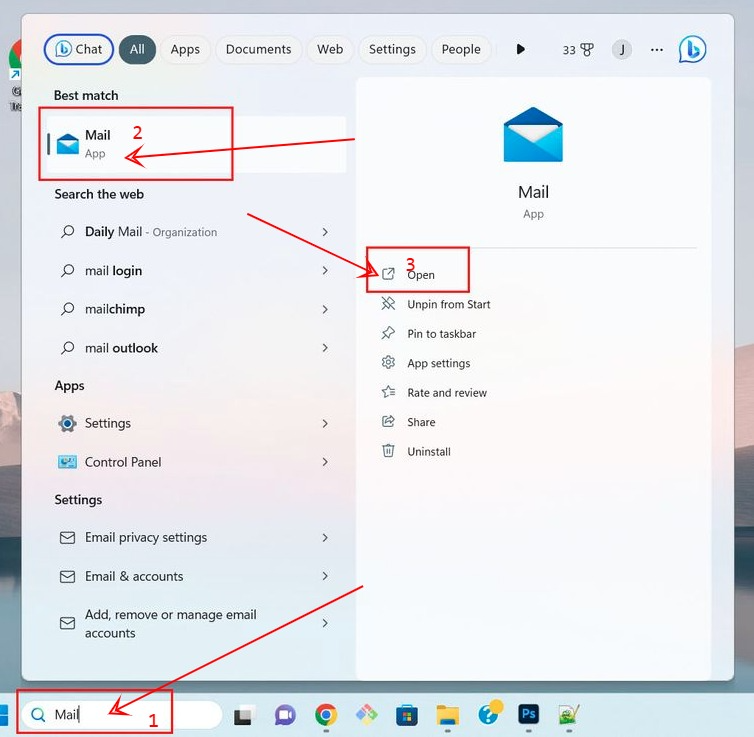
Step 5: Open the Windows Mail App
Launch the Windows Mail App on your PC.
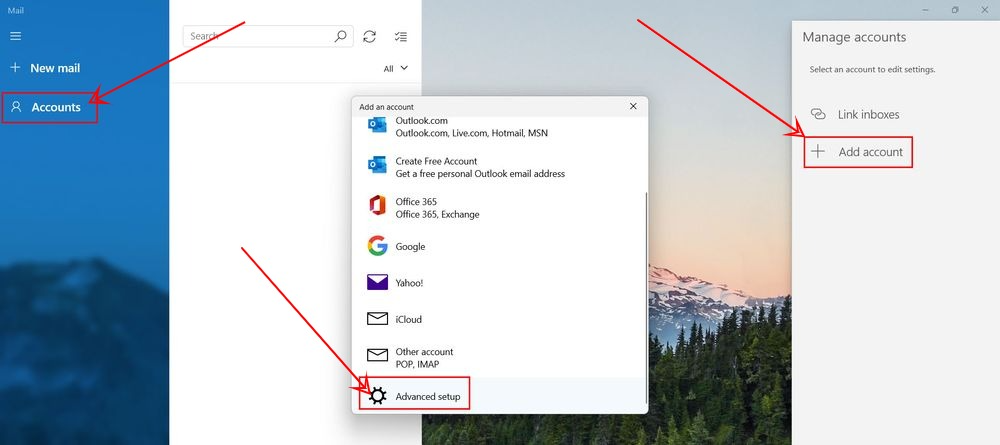
Step 6: Add a New Account
- Click on Accounts > Add Account.
- Select Advanced Setup from the list of options.
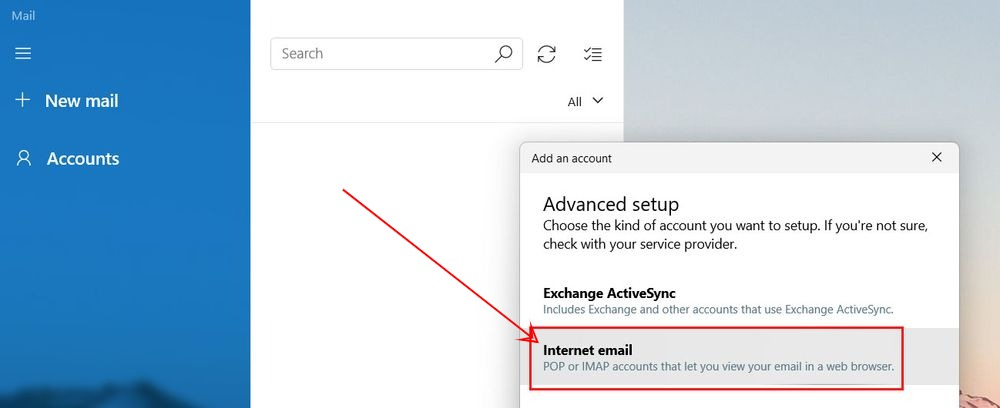
Step 7: Choose Internet Mail Option
Select Internet Mail to manually configure your email settings.
Step 8: Enter Your Email Account Details
Fill in the required details as follows:
- Email Address:
your-email@yourdomain.com - Username:
your-email@yourdomain.com - Password: (Enter your email password)
- Account Name: (Enter a name for this account, e.g., Business Email)
- Send Your Messages Using This Name: (Your name or business name)
- Incoming Mail Server:
mail.yourdomain.com - Account Type:
IMAP4(Recommended) orPOP3 - Outgoing (SMTP) Email Server:
mail.yourdomain.com - Enable Authentication: ✅ Yes (Required)
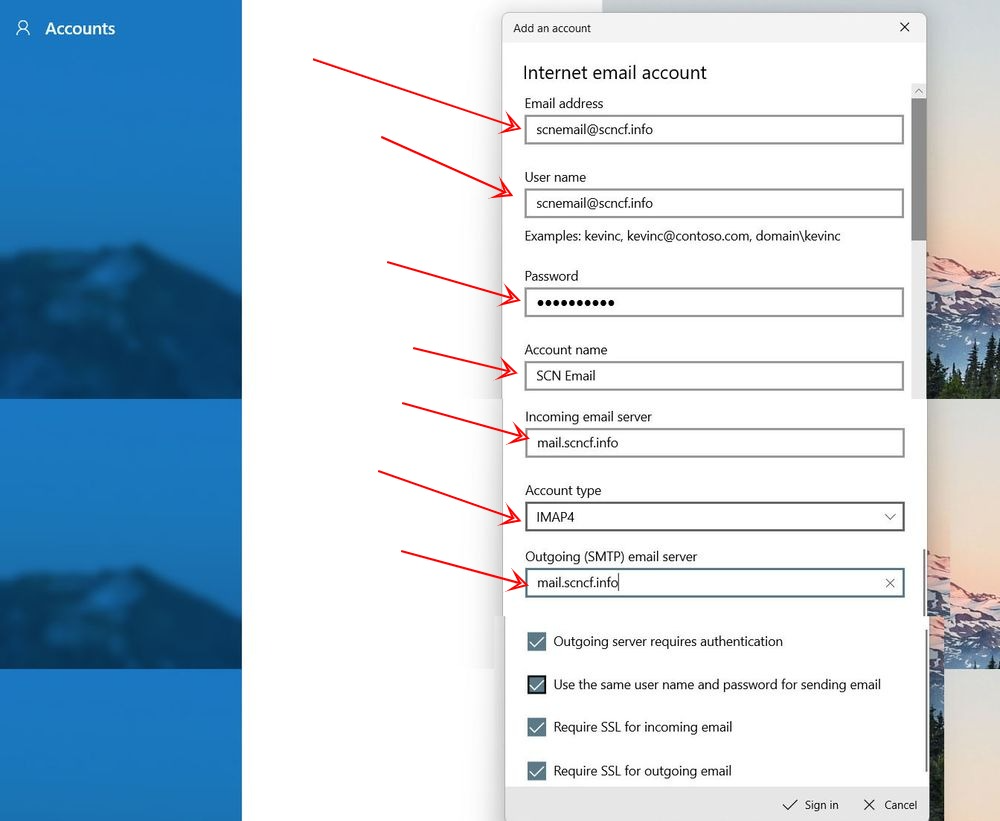
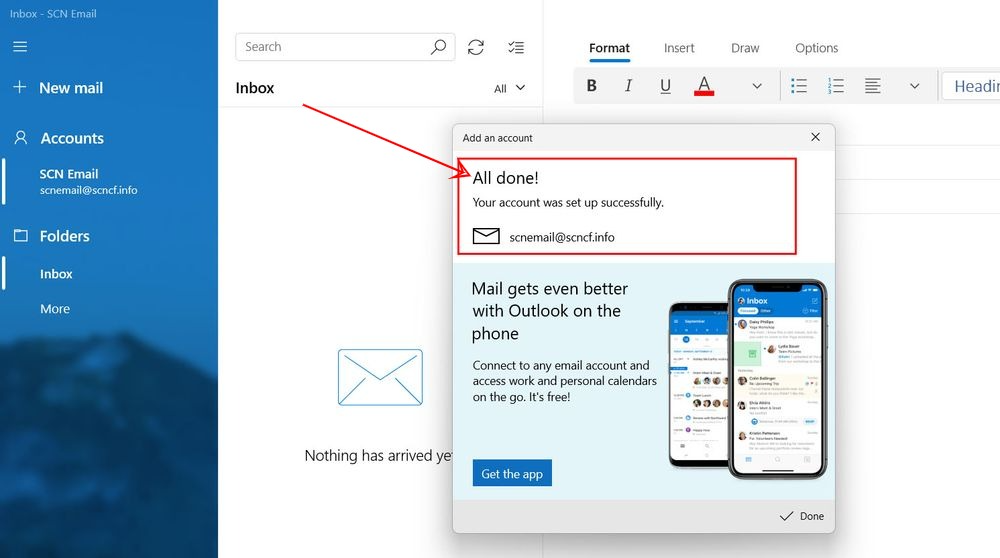
Step 9: Complete the Setup
Click Sign In to finalize the setup. If everything is correct, you will see a confirmation message stating that your account has been successfully added.
Final Thoughts
You have now successfully configured your YesDomain email in the Windows Mail app! You can start sending and receiving emails seamlessly from your desktop.
If you face any issues or need further assistance, feel free to contact our customer support team at YesDomain.io.
✅ Need help? Our team is available 24/7 to assist you!