Managing your hosting service is simple with YesDomain’s Client Area. Whether you want to access your control panel, manage your website, or update settings, you can do it all from one place.
This guide will help you log in to your hosting control panel directly from the YesDomain Client Area with just a few clicks.
Step-by-Step Guide to Access Your Control Panel
Step 1: Log in to the YesDomain Client Area
- Open your browser and visit the YesDomain Client Area login page.
- Enter your registered email and password to log in.
- If you have social login enabled, you can sign in with Google or Facebook.
Read This For How to Login to Client Area at Yes Domain ?
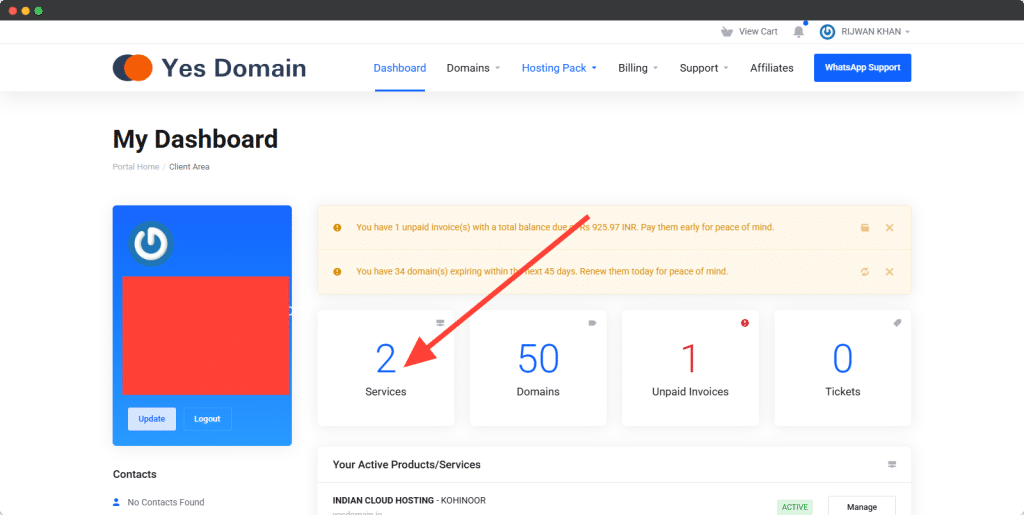
Step 2: Select Your Hosting Service
- Once logged in, navigate to the “My Services” section.
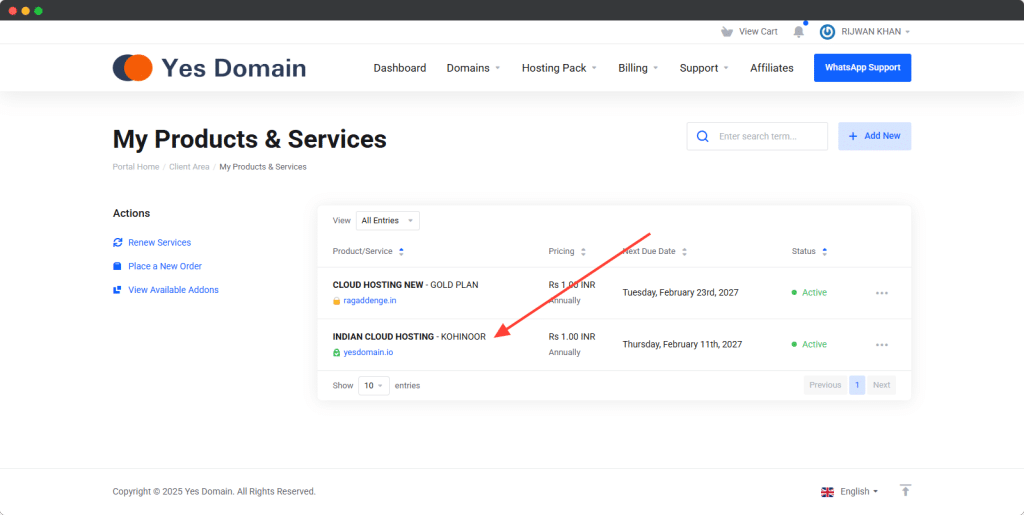
- You will see a list of all your active hosting services.
- Click on the service whose Control Panel you want to access.


Step 3: Click on “Access Control Panel”
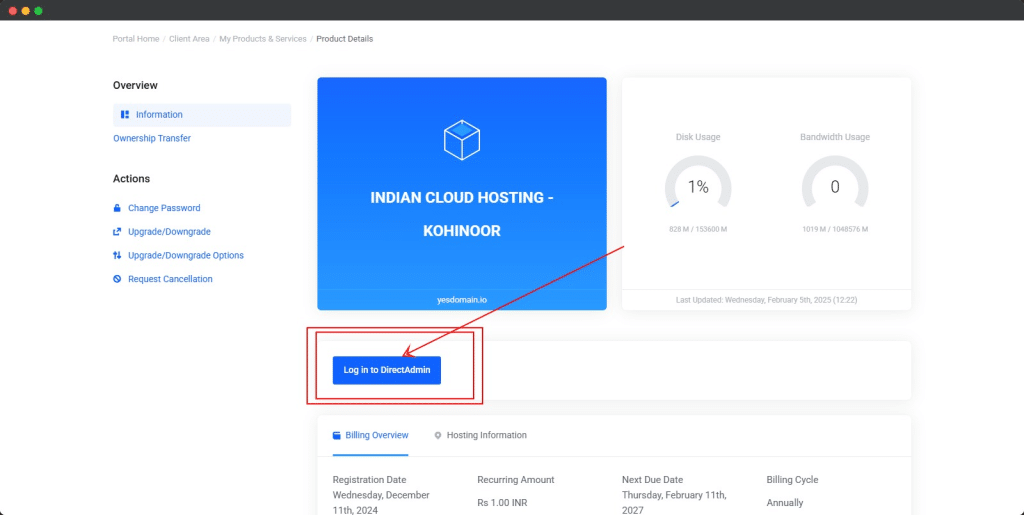
- You will now see the hosting service details page.
- Look for the “Access Control Panel” button.
- Click on it, and the control panel will open in a new tab.

Step 4: Manage Your Hosting from the Control Panel
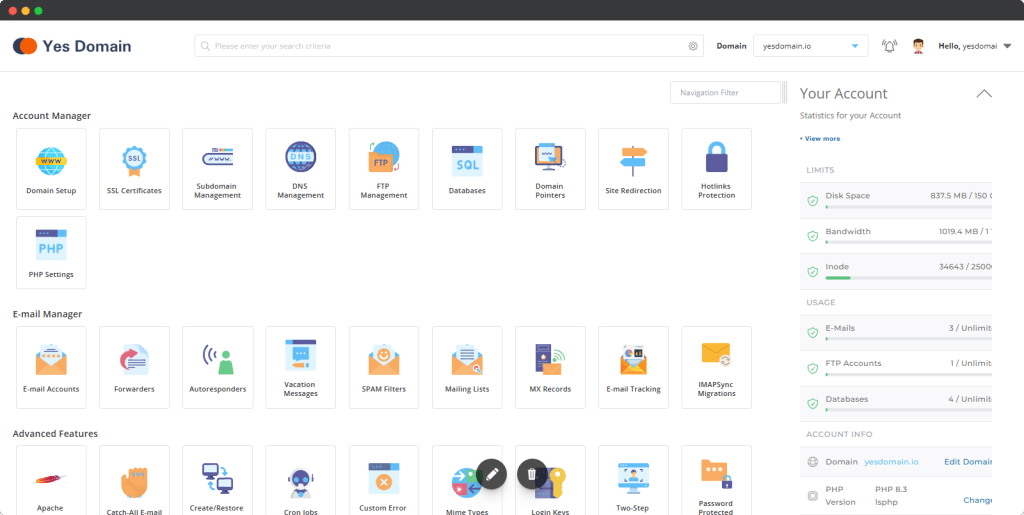
Once inside the control panel, you can:
✔️ Manage domains & subdomains
✔️ Set up emails
✔️ Install WordPress & applications
✔️ Upload & manage files
✔️ Monitor server resources

Troubleshooting Login Issues
🔹 Forgot Password?
- Click on “Forgot Password?“ on the YesDomain Client Area login page and reset your password via email.
🔹 Login Button Not Working?
- Try clearing your browser cache or using a different browser.
- Ensure your internet connection is stable.
🔹 Unable to Access Control Panel?
- If you face issues, contact YesDomain Support for assistance.
Conclusion
Logging in to your YesDomain Control Panel through the Client Area is quick and easy. By following this guide, you can manage your hosting services efficiently.
💡 Need Help? Contact YesDomain Support via WhatsApp: +916203299660 for assistance.